Assembling a PC in an old Macintosh SE Case
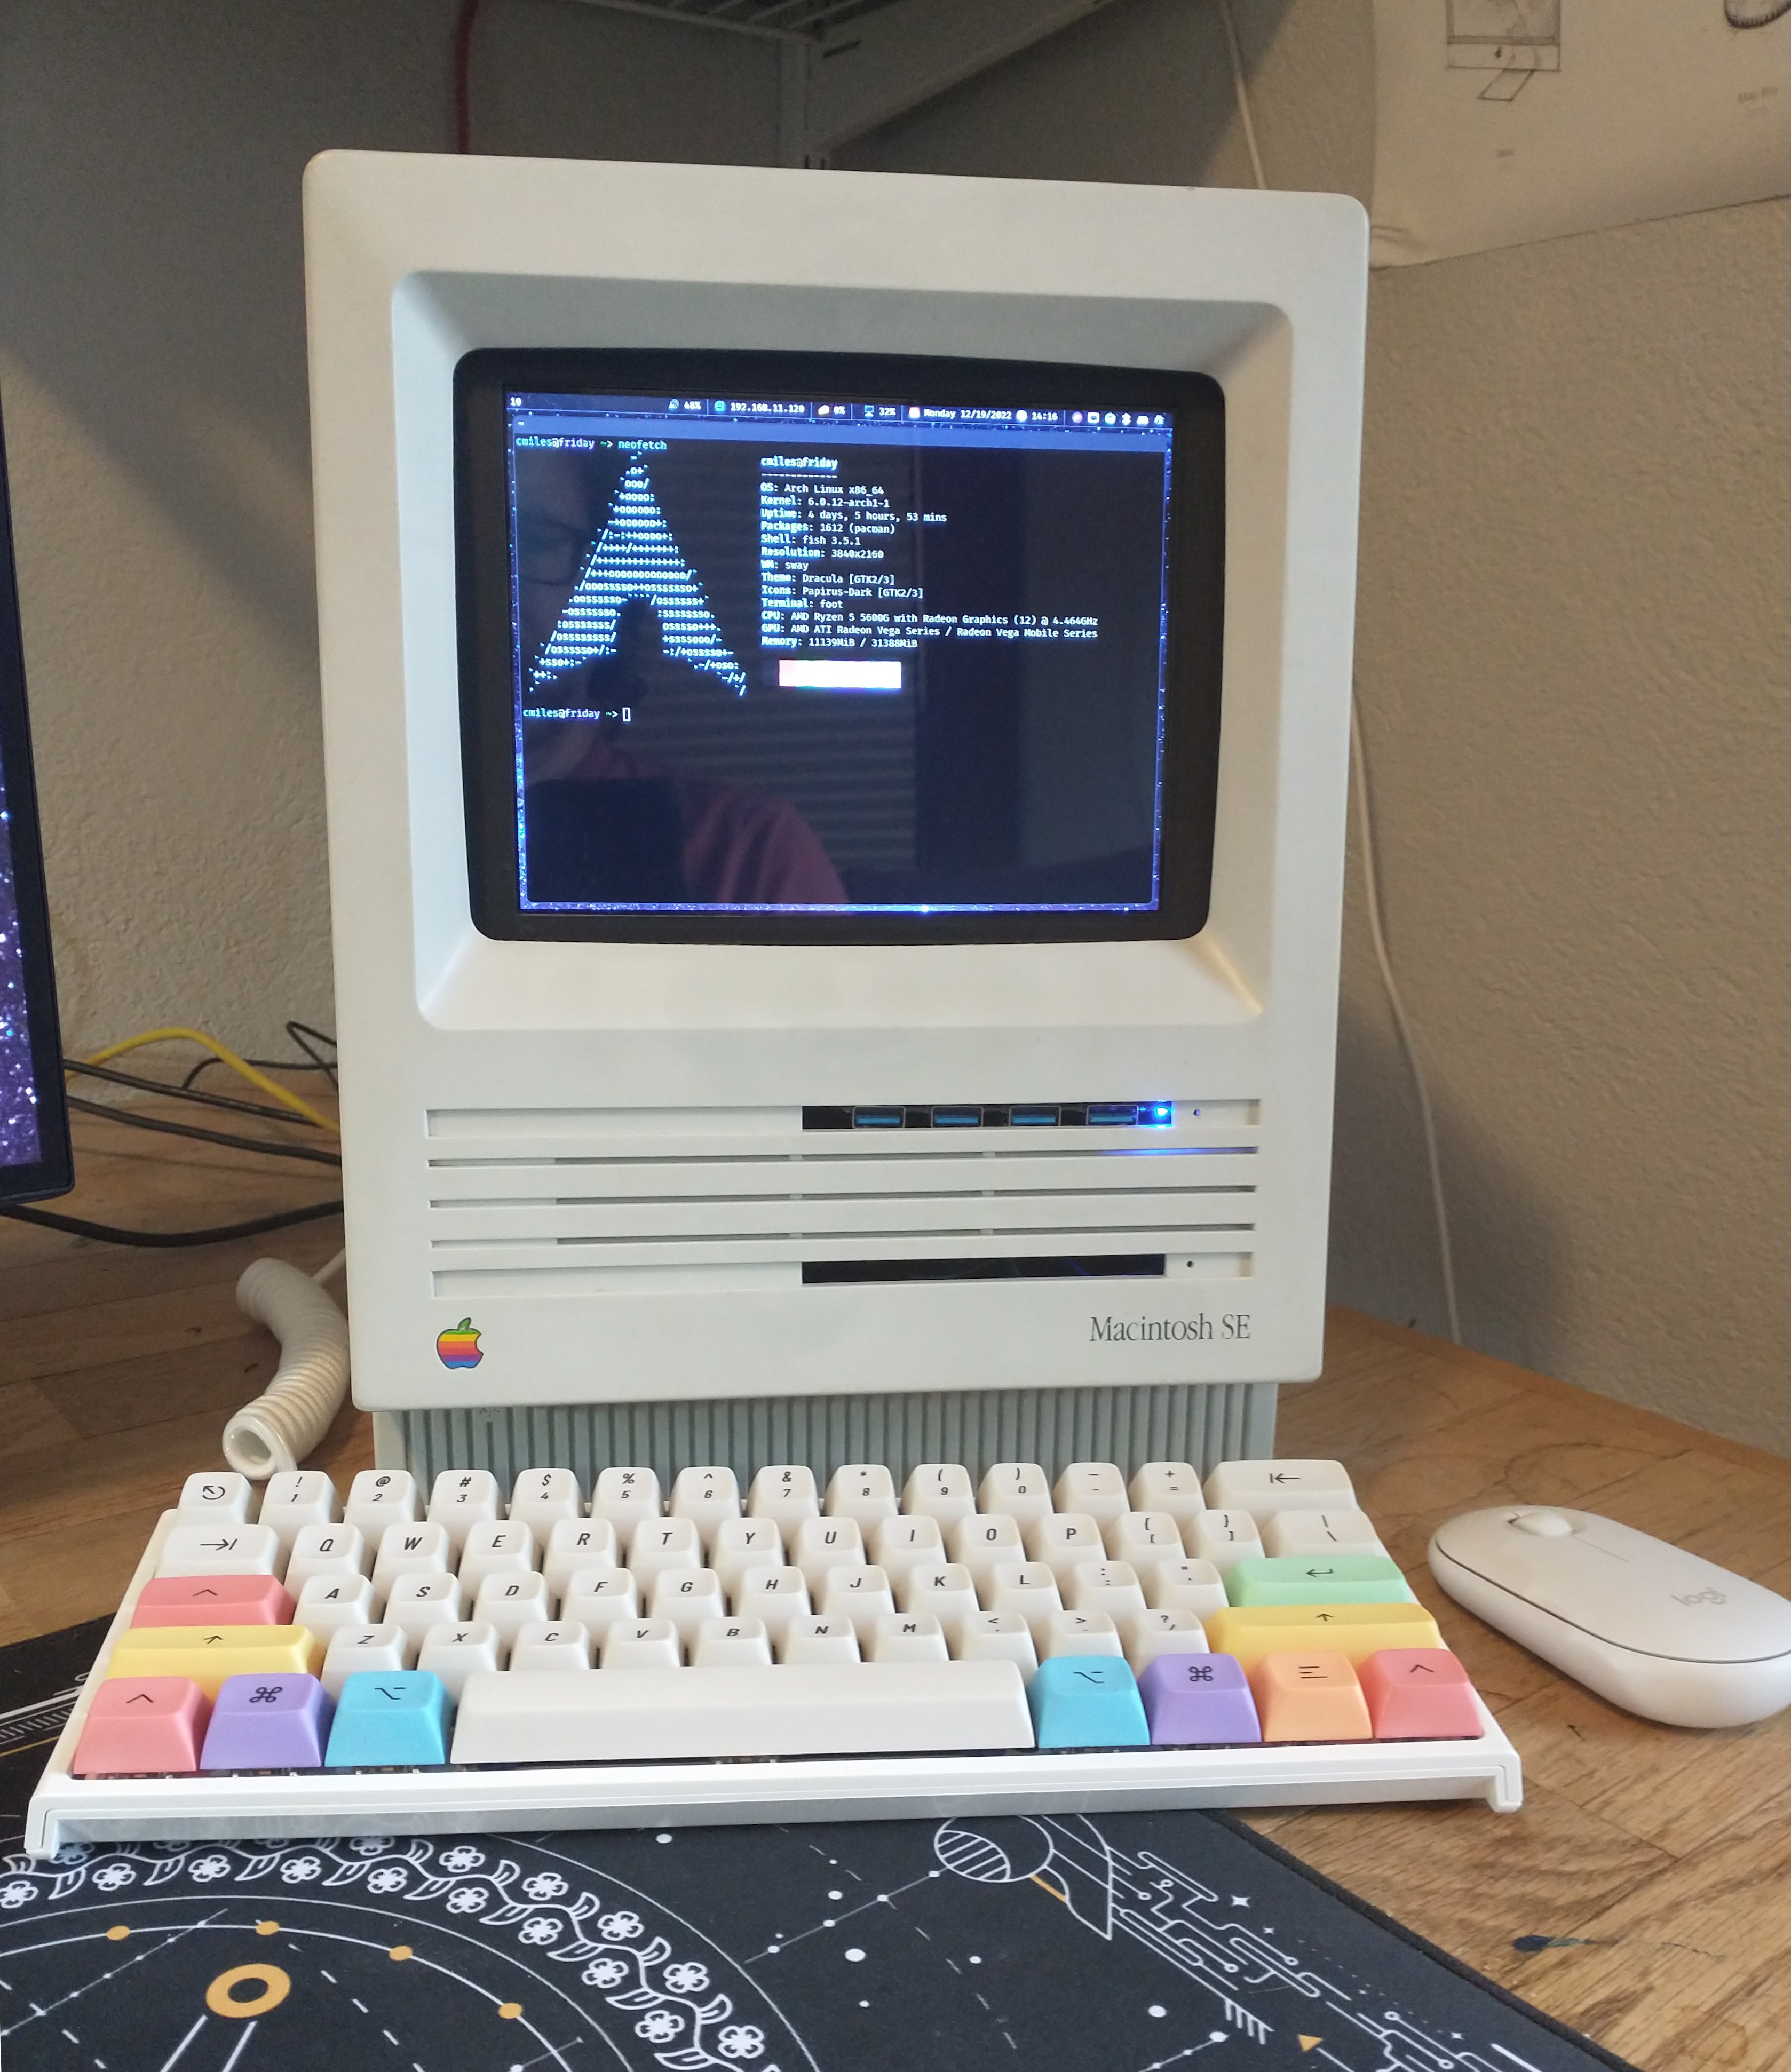
Brand new workstation, very old case!
Back before the pandemic I did all of my work from a laptop. I’d tow it back and forth between my home and work but, honestly, I mostly used it at work. The idea was that if there was a critical issue I’d have it handy and if I traveled to visit a customer it would be close at hand.
Things have certainly changed! Now I mostly work from my home office, my laptop spends most of it’s time plugged into a docking station powering a larger display, proper keyboard, etc. Many of the compromises the laptop represents no longer make as much sense. Why should I favor a small, light form factor when all it does is sit on my desk? Plus the harder it works, the warmer it gets and the more work it’s tiny internal fans spin, limiting it’s life span.
I decided to free myself from the shackles of the laptop, to build myself a real workstation that can easily handle my workload. From time to time I do travel, it would be nice to have something at least somewhat portable. If the day comes where I need to return to the office, it would be nice to be able take my PC with me. Maybe I’d take it home on weekends.
With these constraints in mind I started looking around at cases, looking for one that said “could maybe be moved” and “not entirely lacking in soul.” It turns out that there’s no shortage of featureless gray or black boxes but I wasn’t really excited about any of them. Then I thought back to the old Mac Classic II that I had in college, it was heavy but it had a handy duffel bag-ish thing I could lug it around in. Why not use that?
Decision made, I bought an old Macintosh SE case from a seller on eBay that was already bereft of guts and CRT. I measured the interior and was relieved to find that it would easily fit a mini-ATX board. All I had to do was 3D print some scaffolding to hold the pieces together and I’d be all set!
More easily said than done, but after about a year I finally have it finished up and working. Behold, my small but mighty six core AMD Ryzen 5 powered workstation!
I filled the top floppy drive bay with a USB hub. I’ve moved the power switch to the front, where the brightness knob once was is a nice, chrome push-button. It also has it’s own speaker, just like the old Mac SE.
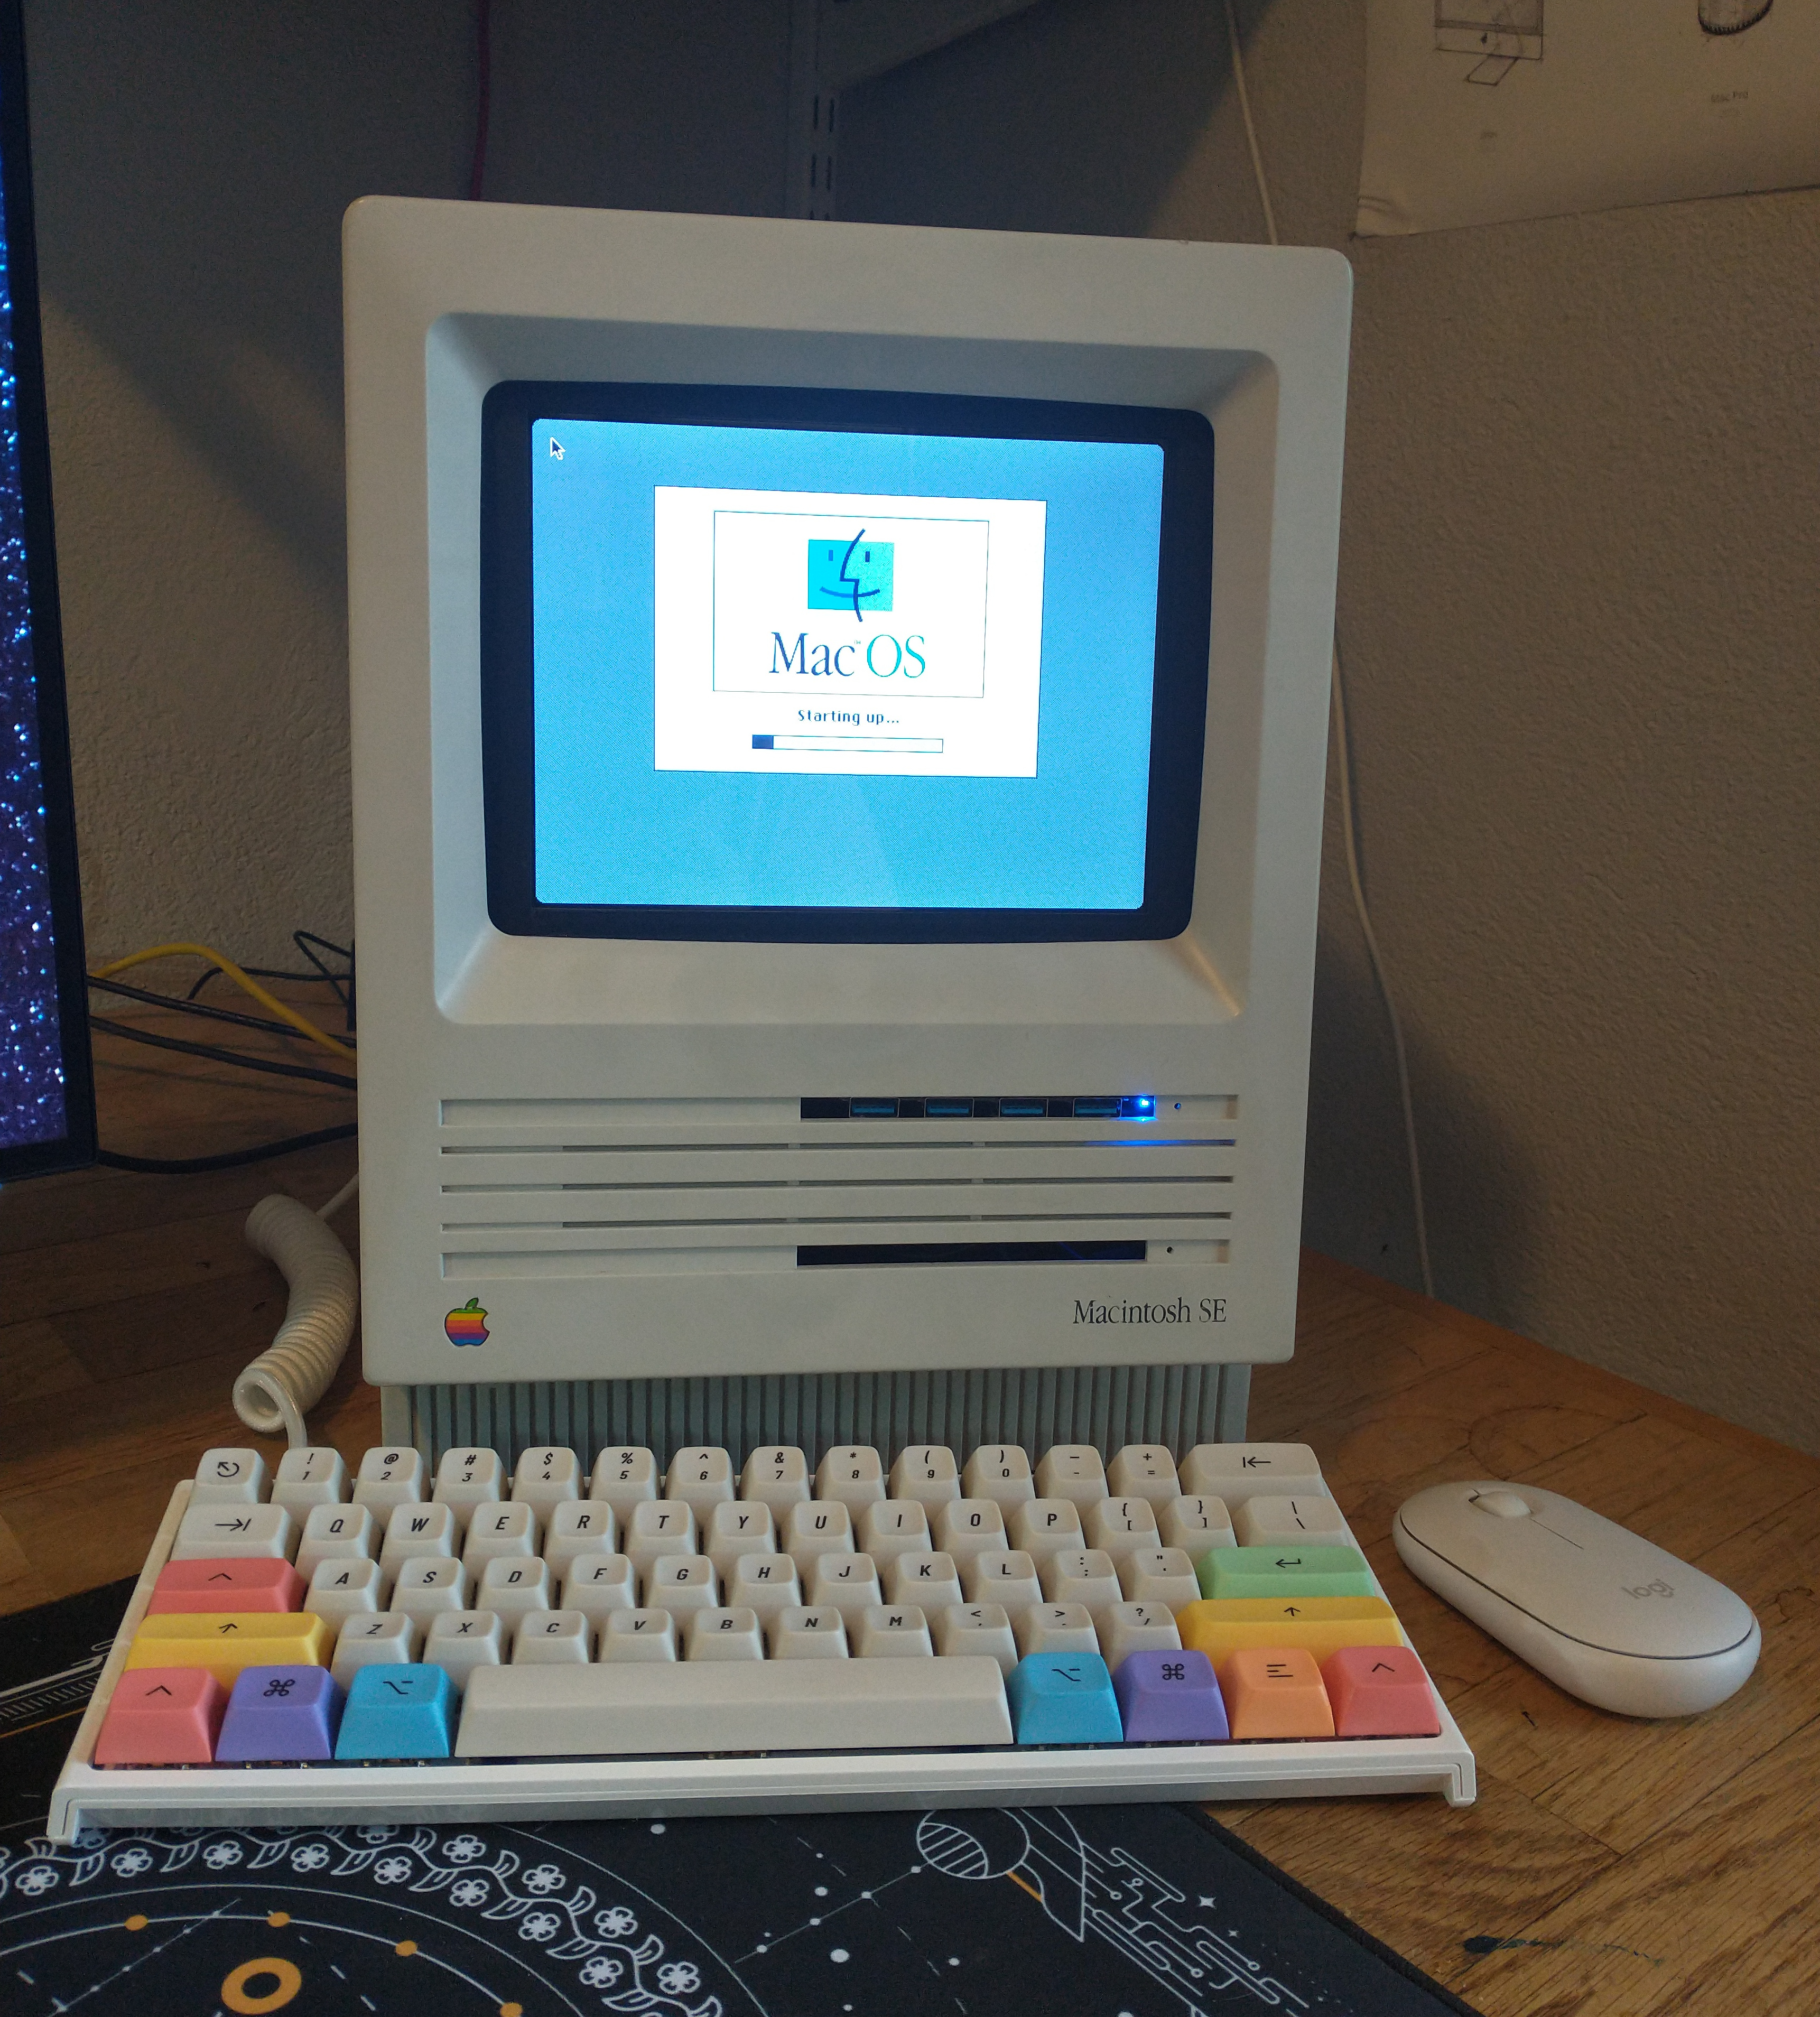
An virtual machine running the MacOS of the era (although in color) is only a key-press away. 😯
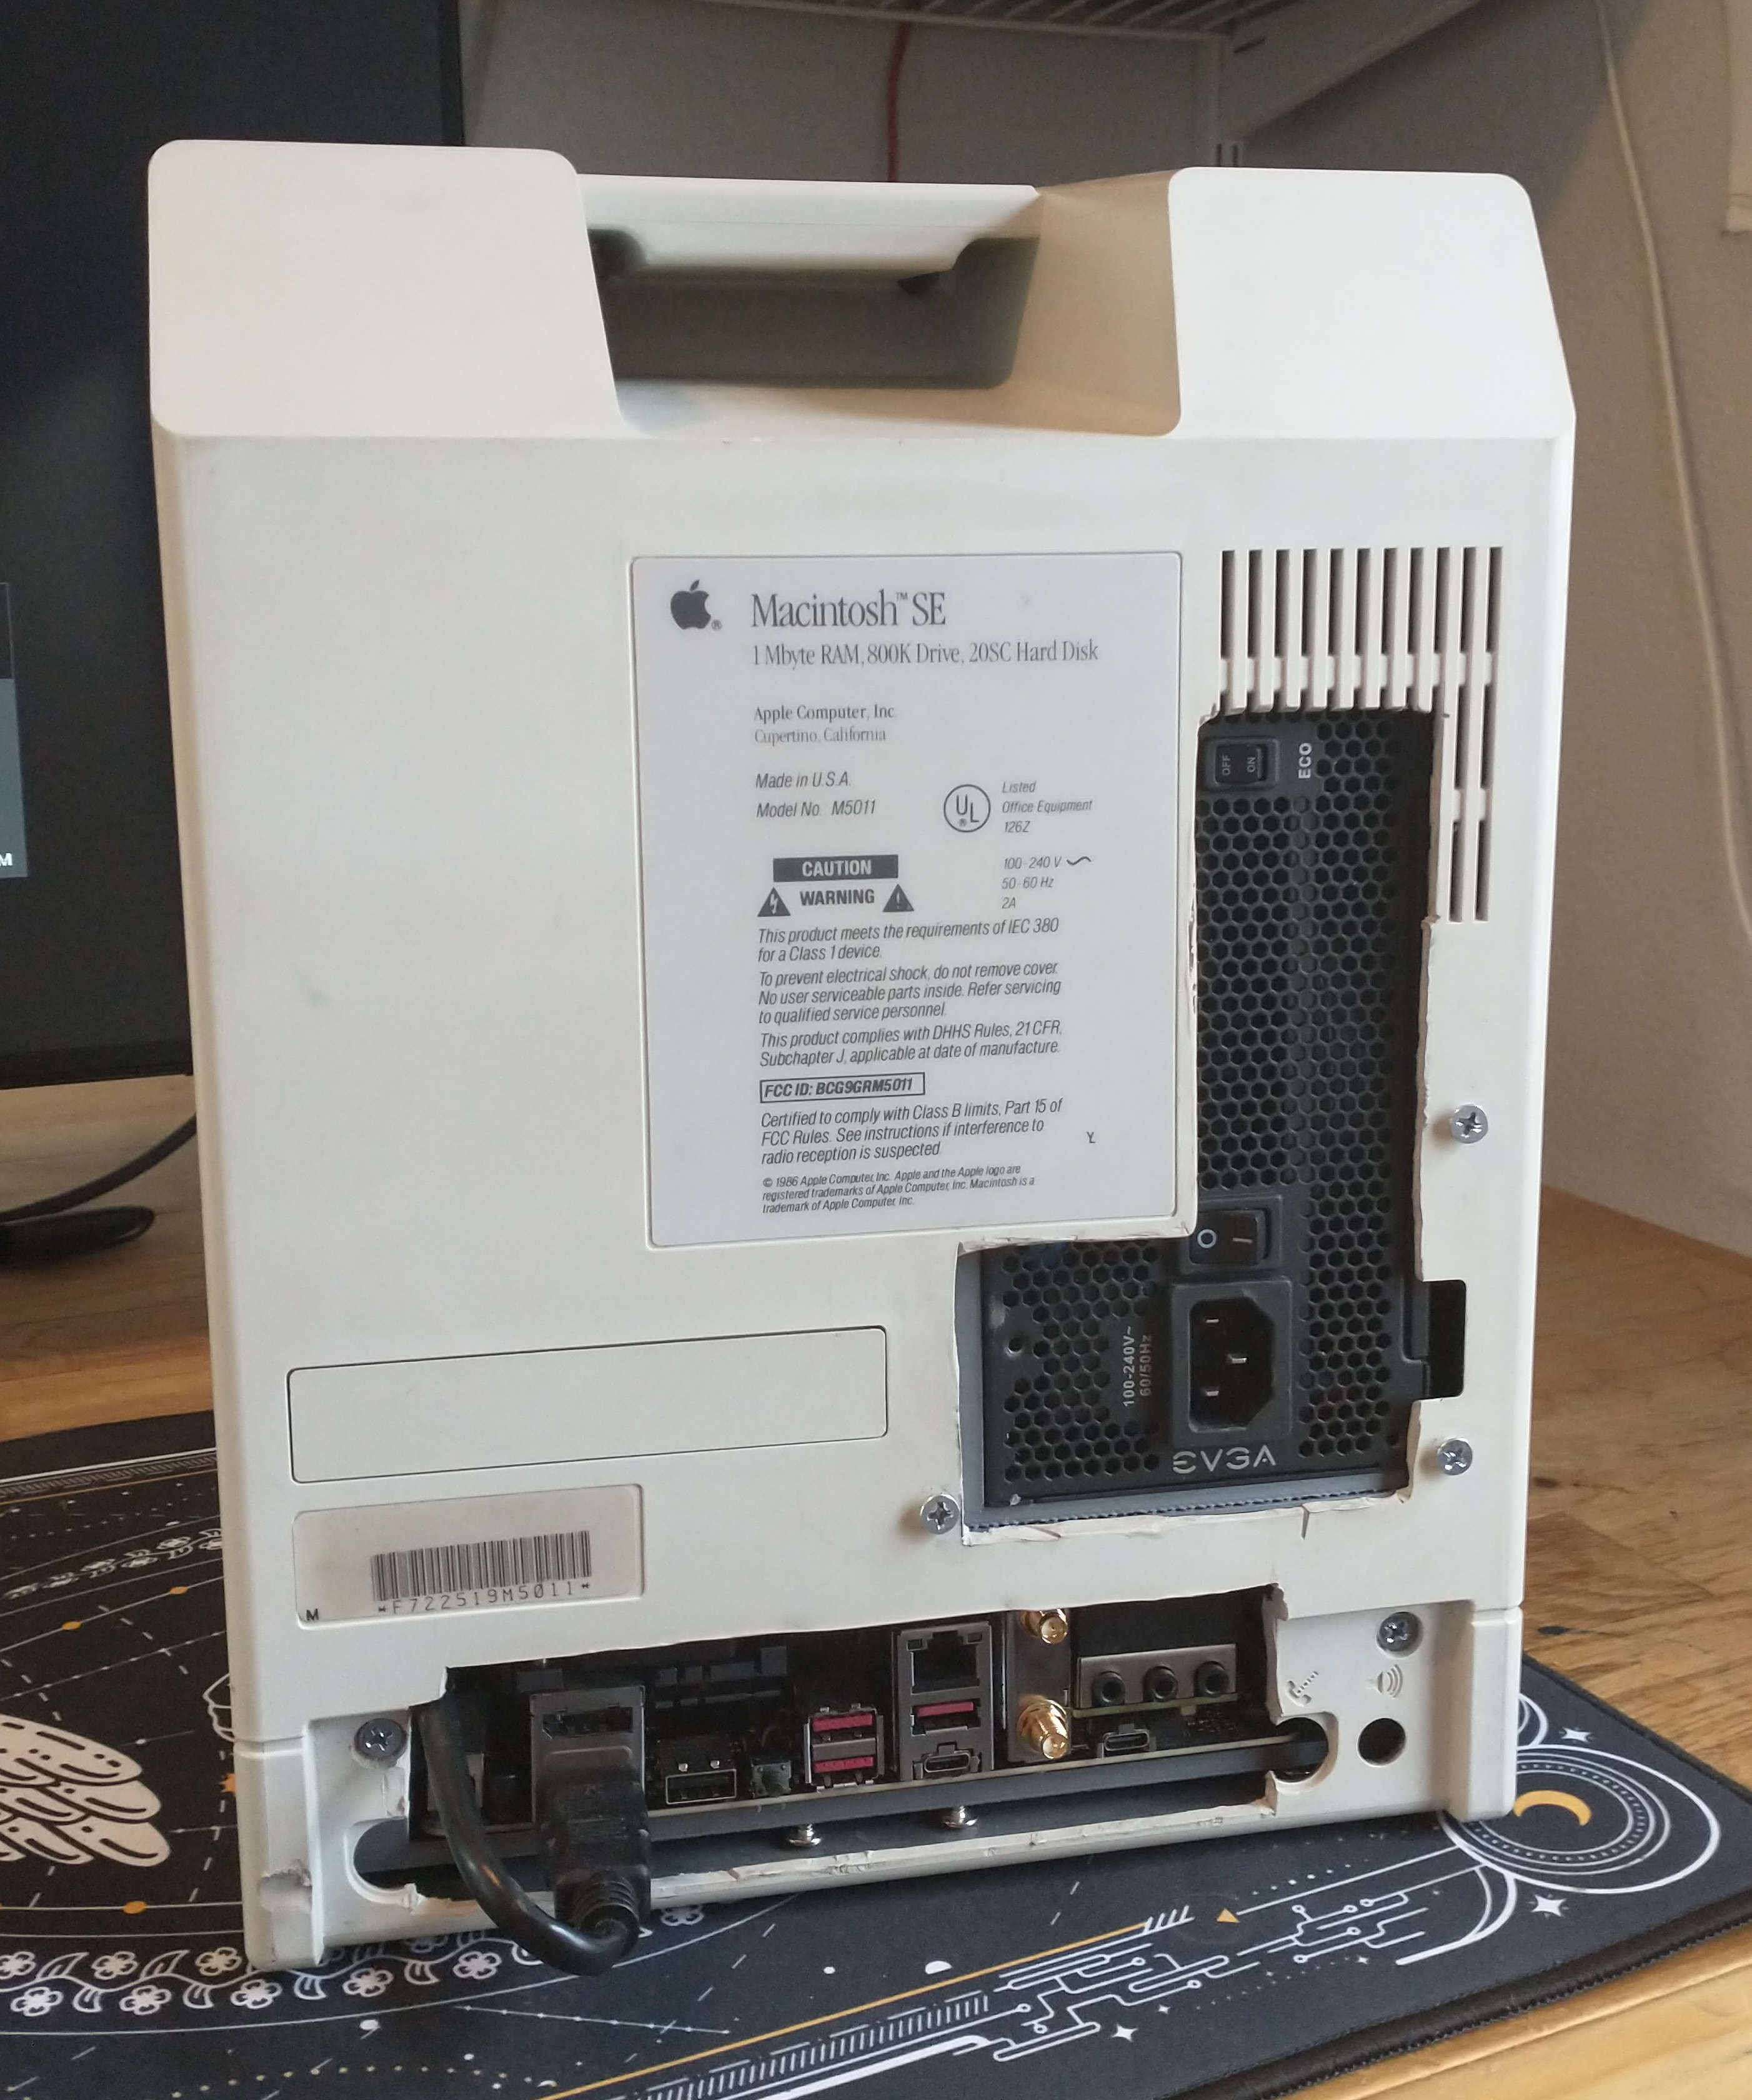
The rear didn’t come out as nicely as I wanted but it could have been worse. 😛 I didn’t realize until far too late in the project that the logic board I purchased didn’t support USB-C video out, I had to run a cable to power the front LCD display. I also cut a little too low into the case for the ports and that looks pretty hacky. I may go back and print up a cover of some kind.
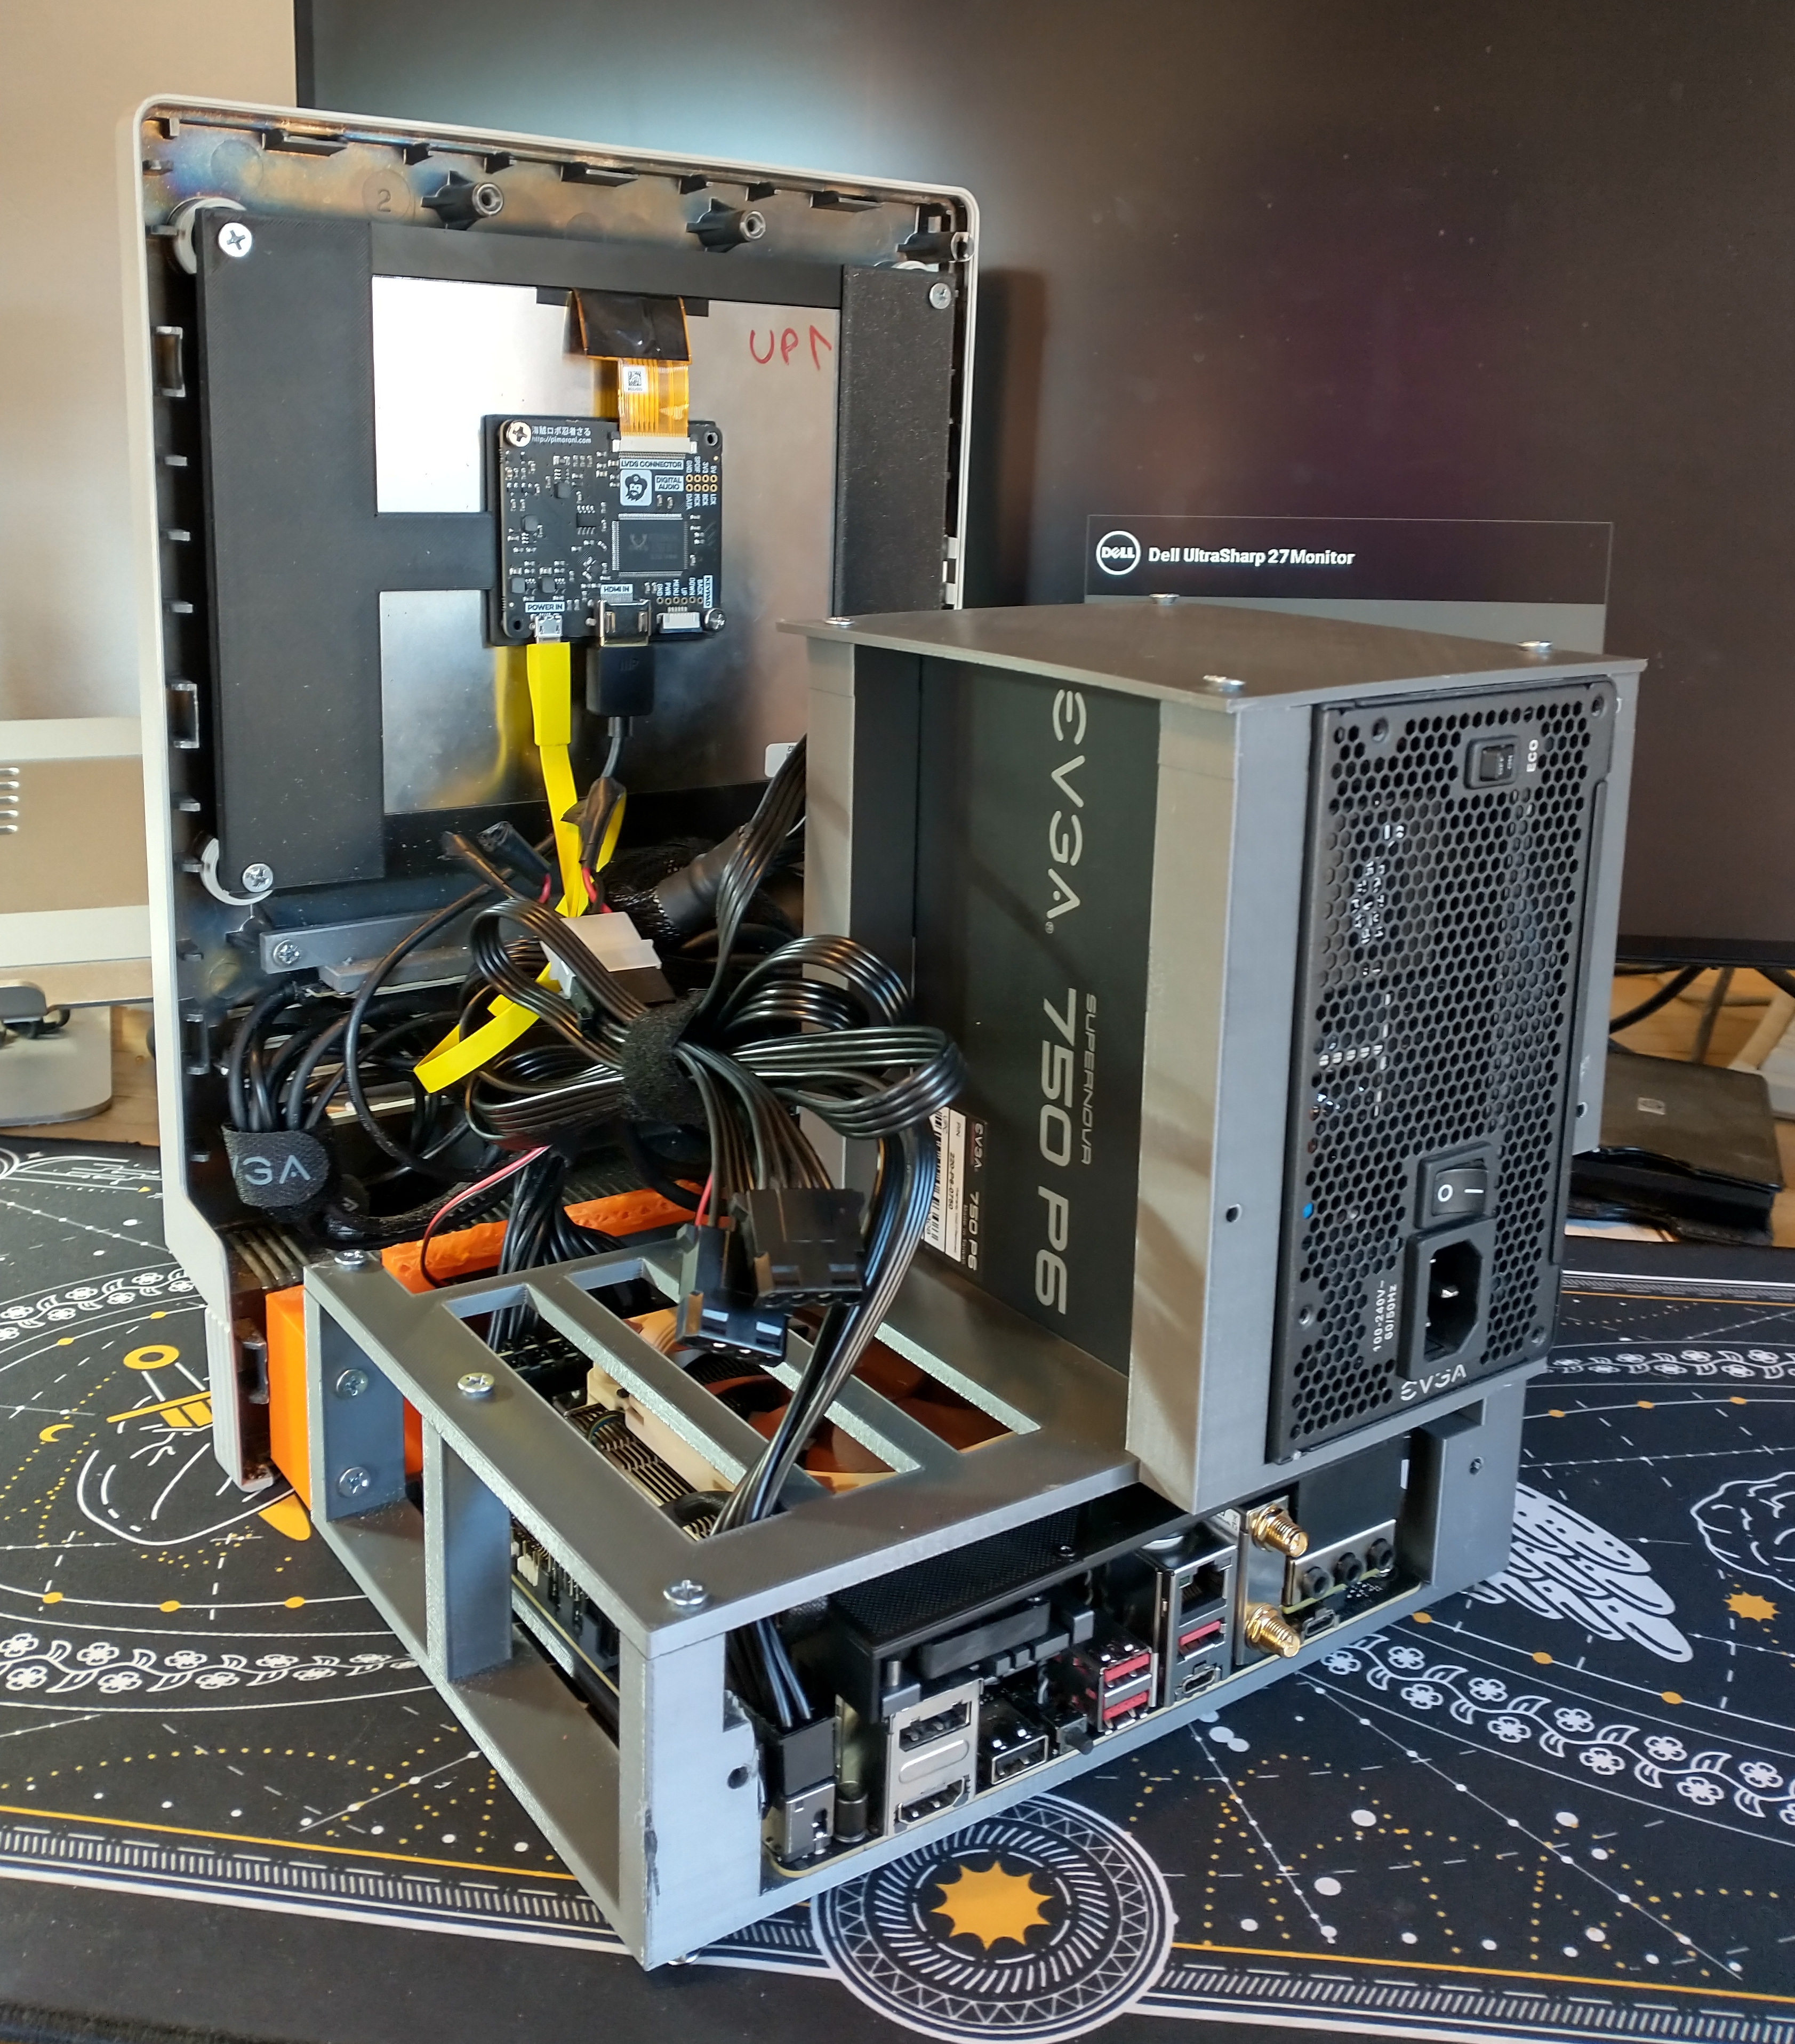
The scaffolding for the interior isn’t too complicated, I had to print the lowest layer in two parts in order to get the depth that I needed. The lowest layer holds the logic board and its components, the next layer supports the power supply. It was tricky getting a nice, snug fit on the front display that looked natural; I was saved by an adapter for the front of the case that worked out great.
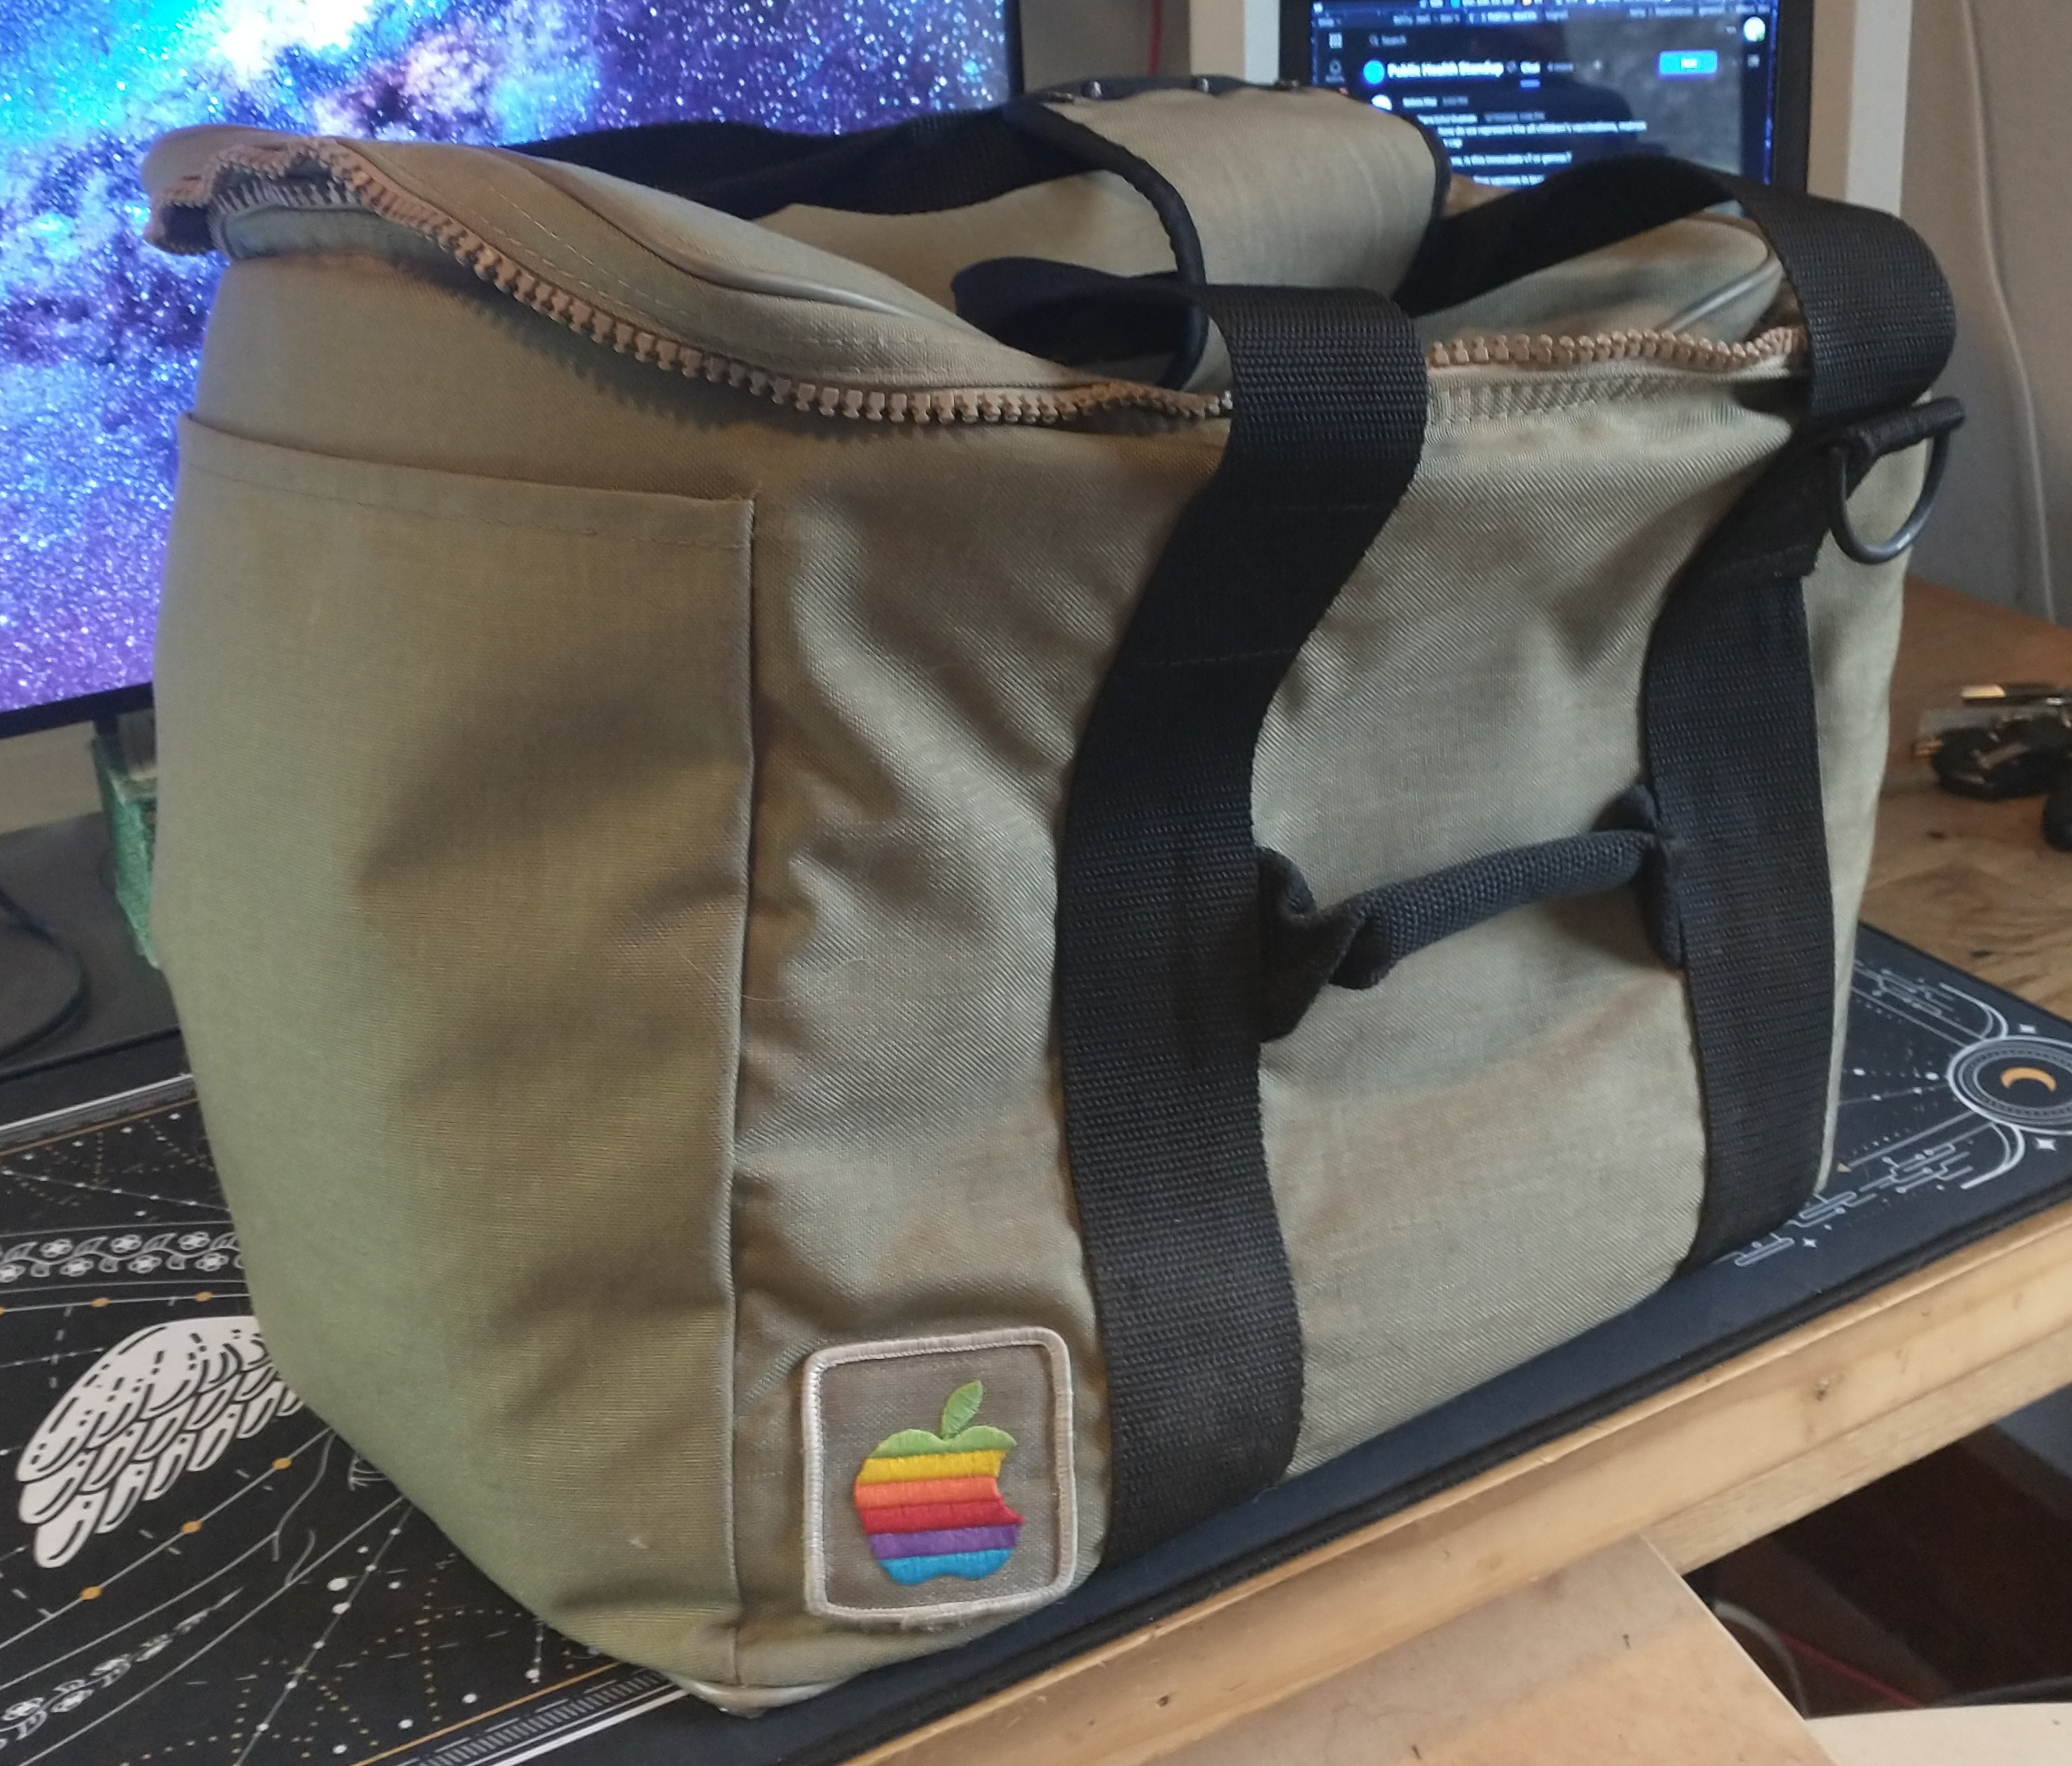
After some searching around on the internet, I finally found a period travel bag that was in decent shape. After a little cleaning and repair, it’s good to go.
It’s been a month or so and this little guy is working out great. While its little LCD panel is on the small side, it’s not entirely useless. I’ve been parking my various chat windows (Teams, Slack, etc.) over there, keeping them out of my main work area. The low-profile Noctua CPU fan I picked out is silent most of the time and nearly silent when the machine is working hard, I haven’t seen any throttling.
So far it’s been a significant improvement over my laptop, I have no complaints. I’m also a little surprised at my schmalzy nostalgia for this case, I really enjoy seeing it perched on the edge of my desk.
Comments powered by Disqus.